Scott Sonnon provides us with a superb video for a Do-it-yourself suspension trainer.
With some build information and great ideas for training too, it makes this a great video in the TRX/Suspension Trainer family.
I really like the style of this video, with all the mention of recipes and addons, '100% of results out of your rope', love it!!! I'll repeat it, 100% RESULTS FROM YOUR ROPE (don't forget that)
'Rope' is #1 ingredient of the DIY'ers out there!
You need to get 100% results from your Homemade Exercise Equipment
too!
Thursday, July 21, 2011
Tuesday, July 12, 2011
DIY Euro Pinch Device
This will be the last DIY Grip Device posts for a while, apart from a round up.
For those who don't know what a Europinch device is: David Horne (Grip master) invented this back in 2004 for pinch grip competitions so that it would cater for athletes of all hand sizes to be able to compete against each other fairly. Although I don't have an original it is on my shopping list.
I currently use a 1 inch bar with collars and plate to prepare myself for grip competitions. This build would be a better option, with the best option being actually buying a Europinch from David Hornes World Of Grip Shop
If you liked this you may also like my DIY Pinch Lever
Saturday, July 9, 2011
Tendon Strength? Maybe Just Slow Down a Little!
It should have been here yesterday, right? We're a subculture within a larger culture that can't stand things that don't happen right now, if not earlier. Waiting for a stubborn body to meet the goal that we set for it is the strength training equivalent of Dial-up AOL. It's got to happen and it better happen sooner rather than later, right?
As I walked through Dicks Sporting goods, I notice an effort to bring tools formerly reserved for our out-of-mainstream, semi-underground movement percolating to the surface. It's not just our tools either but also some of our ideas and beliefs around training. One such idea I've seen and heard passed around lately revolves around tendons and ligaments, particularly around strengthening them.
That's a good thing, I guess. These are just as much a part of the strength picture as the meat that we use to propel our bones. They're attached to tendons, so that makes sense to give them some consideration when we train.
The question then becomes what kind of consideration? How do we strengthen our connective tissue? That's where I break from the old school. I've never given an ounce of thought concerning the strength of my tendons or my ligaments. I've never done any special exercises for them. Yet, I've had no problems with them when training.
So, the idea of doing tendon-strengthening exercises never appealed to me and after cracking open some books on the topic, the reason became very clear to me. Tendons (and ligaments) are made up mostly of collagen that's arranged in a fiber-like and parallel manner. What lept out at me is that, unlike muscle, they're poorly vascularized and innervated. Without these, they recover much more slowly since they depend on absorbing nutrients from things surrounding them.
It appears to me that answer to keeping these bone connectors and organic springs in decent shape was to buck the urge to force the muscles to do things faster than the blessed meat strings can keep up with. I've never had a problem with waiting months to see a goal come to fruition and I think that's why I have never had an issue with anything resembling tendinitis. From what I've heard, that's a nasty, NASTY problem that only has one solution: time to heal. No exercise. Does that really sound good to anyone?
So, from where I'm standing, patience is what these rarely thought of chunks of protein really need to get strong. Not only do they need it, but they demand it... and they will get it! Either we will take the time to let them get strong or we will take the time to let them heal. Think about it this way: our tendons are the little brother/sister of our muscles. Many of us were obliged, or otherwise forced, to take our smaller siblings along for play time even if they slowed us down. It's the same sort of scenario here.
Sunday, July 3, 2011
Weighty Matters: Combining Weights and Calisthenics
It doesn't matter where you strike up the conversation. It could be in the internet or in real life. Either way, whenever the subject of weights vs bodyweight comes up, someone eventually takes the middle ground and says something to the effect of, "why not do weighted calisthenics? There's no need to argue when you can combine the best of both worlds. There's no rule book that says it's not BW if there's added weight."
Okay, let's compromise! There's been enough bickering about the whole weights vs. BW. Let's all be friends and talk about weighted Calisthenics. Generally, two exercises get the call when it comes to adding weight: Dips and pull-ups. There are others you can do, of course, but these two are the most accepting of using a wider array of weighted material to do the exercise since you hang to execute them, thus creating lots of open space around you.
So, we've got our base exercises to weigh down. The question now is: with what? There are a lot of different things that you can use to add weight to calisthenics. the most common are:
Over the past year and a half, I've had the opportunity...wait, not the right choice of words...I've been forced to improvise and use all but the weighted vest. They're not all the same and each one has its benefits and drawbacks, so I'll go over them one at a time, based on my experiences.

Backpacks
This is, without a doubt, the cheapest way to get into weighted calisthenics, if you already have a pretty durable backpack. You can throw weight plates or bags of sand (whichever you have handy) into the bag and get going. Backpacks are an easier weight to pull or dip with. I'm tempted to talk about leverage in relation to weight distributions but since I always seem to stick at least half of my foot in my mouth with such talk, I'll just say this: Something about the weight placed on the back feels easier to me. So, if you're looking to progress with more weight, you're probably going to hit a wall. For most backpacks, it's going to be difficult to get much more than 75 lbs in the bag and still have the bag hold up to the load. Of course, that just means that you need to find another way to make the exercise harder. I did a lot of my famous towel pull-ups with my 40 lbs tool backpack. I didn't miss not having an extra 15-20 lbs back there!
Dip Belts
Probably the most common tool to do weighed dips and pull-ups and for good reason. If putting lots and lots of weight on your dips,pulls and chins is your game, then you need a dip belt. You just can't get as much weight onto your pulls and dips with any other tool as you can with a dip belt. Reasonably inexpensive (if you already have the weights), cheap and easy to make one of your own and capable of using several different pieces of weight (plates and kettlebells being the most common), this would make the most sense for weighted calisthenics. I also notice that the weight dangling between the legs makes the exercise harder than loading it on the back. So, you get more work out of the weight this way. Plus, this method is also reasonably comfortable, even with a lot of weight.

Chains
For sheer versatility, chains completely blow everything else out of the water. You can use them so many different ways (make necklaces, bandoleers, or make a dip belt out of it, if you have the right fasteners) in addition to using them on barbells for squat, deadlift and overhead work. If you make a chain bandoleer, push-ups become an option for weighted calisthenic work too! I don't know how much self-image plays into your training but if you want to look like the most hardcore, Metallica-blaring, raw-meat eating muthafucka' in your gym, then chained calisthenics are the way to go! It just looks flat-out cool to work with them!

As cool as they look, chains were made to tie machinery down and lift machinery up. They weren't made to be worn and there's the rub (literally) with chains: they're not comfortable to work with. You might want to add towels for padding and keep your shirt on. It's not like anyone wanted to see your chest that badly anyway (unless you happen to be a young woman). Strike two with chains is that they are expensive. If you're one of those people who figures out the cost per lbs of your weights, then chains will give your cheap bastard heart an attack. While it's cheaper to buy smaller diameter chain, it's also easier to tangle up. NOT FUN! The big stuff can be purchased at rigging or trailer supply stores but like I said, it's expensive! I personally like the 1/2" chain the most. It's a good blend of weight, price, and ease of use. If you go this route, go for what's called Grade 30 or Grade 40 (sometimes called grade 3 or 4 as well). It's a lot cheaper than the higher grades (Grade 80, used for lifting tens of thousands of pounds overhead. You obviously don't need to pay extra for this kind of durability if all you're using it for is weight).
Dumbbells
I've used dumbbells (and dumbbell-like objects) with dips, pulls and chins quite a bit. All you've got to do is pinch the handle in between your legs, either just below the knees or the ankles. Then, pull or dip.
I made it sound easy, didn't I? While this is very simple, and accessible if you have dumbbells already, it's also very hard to do. In fact, putting a dumbbell between the legs while pulling or dipping is probably the hardest position I've found when adding weight. So, it doesn't take a lot of weight to add some serious challenge to the movement. It'll also throw some leg work into these primarily upper body movements. Talk about confusing muscles!
Is the downside that you need a partner to put the dumbbell in between your legs? Not necessarily so. A few nights ago, I was playing around with dips with a flanged piece of 8" ductile iron pipe. Standing this chunk of iron on the ground, I'd lower myself down, grab the pipe in between my legs, and proceed on with the dips. When I finished, I'd lower myself back down and put the pipe back on the ground. I imagine that alternating between weighted and unweighted dips could be fun too!
What about the weighted vest? Eh. I've got a dip belt, my tool backpack, chains and a couple of dumbbells so I don't see the point. Besides, I've never really been impressed by them. Most weighted vests with any decent amount of weight cost a small fortune, even when compared to big-ass chain. In my not-humble and non-expert opinion, if one had a dip belt and some chain, there's no good reason to invest in the vest. The only advantage I see in them is that, unlike most of the others, they're actually made to be used with calisthenics. So, it's more comfortable but when do most of us care about comfort when we're training?
I recall a while back reading that sometime after he made his hundreds of millions of dollars convincing people that they needed a barrage of machines to make a strong body, Arthur Jones admitted that most people could take themselves to their absolute peak of upper body strength with just weighted dips and weighted pull-ups. Considering the source of the weight machine craze said this, it certainly carries some real weight. Had I just pulled a fast-one on the strength training public and made a fortune that my great-grandchildren couldn't possibly blow while doing it, I'd be very tempted to tell the truth too. You know, just to rub it in everyone's face!
Or, it shows that there really is room for compromise in our often-times uncompromising sub-culture.
Okay, let's compromise! There's been enough bickering about the whole weights vs. BW. Let's all be friends and talk about weighted Calisthenics. Generally, two exercises get the call when it comes to adding weight: Dips and pull-ups. There are others you can do, of course, but these two are the most accepting of using a wider array of weighted material to do the exercise since you hang to execute them, thus creating lots of open space around you.
So, we've got our base exercises to weigh down. The question now is: with what? There are a lot of different things that you can use to add weight to calisthenics. the most common are:
- Weighted Vests
- Dip Belts
- Chains
- Backpacks
- Dumbbells
Over the past year and a half, I've had the opportunity...wait, not the right choice of words...I've been forced to improvise and use all but the weighted vest. They're not all the same and each one has its benefits and drawbacks, so I'll go over them one at a time, based on my experiences.

Backpacks
This is, without a doubt, the cheapest way to get into weighted calisthenics, if you already have a pretty durable backpack. You can throw weight plates or bags of sand (whichever you have handy) into the bag and get going. Backpacks are an easier weight to pull or dip with. I'm tempted to talk about leverage in relation to weight distributions but since I always seem to stick at least half of my foot in my mouth with such talk, I'll just say this: Something about the weight placed on the back feels easier to me. So, if you're looking to progress with more weight, you're probably going to hit a wall. For most backpacks, it's going to be difficult to get much more than 75 lbs in the bag and still have the bag hold up to the load. Of course, that just means that you need to find another way to make the exercise harder. I did a lot of my famous towel pull-ups with my 40 lbs tool backpack. I didn't miss not having an extra 15-20 lbs back there!
Dip Belts
Probably the most common tool to do weighed dips and pull-ups and for good reason. If putting lots and lots of weight on your dips,pulls and chins is your game, then you need a dip belt. You just can't get as much weight onto your pulls and dips with any other tool as you can with a dip belt. Reasonably inexpensive (if you already have the weights), cheap and easy to make one of your own and capable of using several different pieces of weight (plates and kettlebells being the most common), this would make the most sense for weighted calisthenics. I also notice that the weight dangling between the legs makes the exercise harder than loading it on the back. So, you get more work out of the weight this way. Plus, this method is also reasonably comfortable, even with a lot of weight.

Chains
For sheer versatility, chains completely blow everything else out of the water. You can use them so many different ways (make necklaces, bandoleers, or make a dip belt out of it, if you have the right fasteners) in addition to using them on barbells for squat, deadlift and overhead work. If you make a chain bandoleer, push-ups become an option for weighted calisthenic work too! I don't know how much self-image plays into your training but if you want to look like the most hardcore, Metallica-blaring, raw-meat eating muthafucka' in your gym, then chained calisthenics are the way to go! It just looks flat-out cool to work with them!

As cool as they look, chains were made to tie machinery down and lift machinery up. They weren't made to be worn and there's the rub (literally) with chains: they're not comfortable to work with. You might want to add towels for padding and keep your shirt on. It's not like anyone wanted to see your chest that badly anyway (unless you happen to be a young woman). Strike two with chains is that they are expensive. If you're one of those people who figures out the cost per lbs of your weights, then chains will give your cheap bastard heart an attack. While it's cheaper to buy smaller diameter chain, it's also easier to tangle up. NOT FUN! The big stuff can be purchased at rigging or trailer supply stores but like I said, it's expensive! I personally like the 1/2" chain the most. It's a good blend of weight, price, and ease of use. If you go this route, go for what's called Grade 30 or Grade 40 (sometimes called grade 3 or 4 as well). It's a lot cheaper than the higher grades (Grade 80, used for lifting tens of thousands of pounds overhead. You obviously don't need to pay extra for this kind of durability if all you're using it for is weight).
Dumbbells
I've used dumbbells (and dumbbell-like objects) with dips, pulls and chins quite a bit. All you've got to do is pinch the handle in between your legs, either just below the knees or the ankles. Then, pull or dip.

I made it sound easy, didn't I? While this is very simple, and accessible if you have dumbbells already, it's also very hard to do. In fact, putting a dumbbell between the legs while pulling or dipping is probably the hardest position I've found when adding weight. So, it doesn't take a lot of weight to add some serious challenge to the movement. It'll also throw some leg work into these primarily upper body movements. Talk about confusing muscles!
Is the downside that you need a partner to put the dumbbell in between your legs? Not necessarily so. A few nights ago, I was playing around with dips with a flanged piece of 8" ductile iron pipe. Standing this chunk of iron on the ground, I'd lower myself down, grab the pipe in between my legs, and proceed on with the dips. When I finished, I'd lower myself back down and put the pipe back on the ground. I imagine that alternating between weighted and unweighted dips could be fun too!
What about the weighted vest? Eh. I've got a dip belt, my tool backpack, chains and a couple of dumbbells so I don't see the point. Besides, I've never really been impressed by them. Most weighted vests with any decent amount of weight cost a small fortune, even when compared to big-ass chain. In my not-humble and non-expert opinion, if one had a dip belt and some chain, there's no good reason to invest in the vest. The only advantage I see in them is that, unlike most of the others, they're actually made to be used with calisthenics. So, it's more comfortable but when do most of us care about comfort when we're training?
I recall a while back reading that sometime after he made his hundreds of millions of dollars convincing people that they needed a barrage of machines to make a strong body, Arthur Jones admitted that most people could take themselves to their absolute peak of upper body strength with just weighted dips and weighted pull-ups. Considering the source of the weight machine craze said this, it certainly carries some real weight. Had I just pulled a fast-one on the strength training public and made a fortune that my great-grandchildren couldn't possibly blow while doing it, I'd be very tempted to tell the truth too. You know, just to rub it in everyone's face!
Or, it shows that there really is room for compromise in our often-times uncompromising sub-culture.
Wednesday, June 29, 2011
DIY Grip Tools - Pinch Lever - Pinch Lift Device
DIY Grip Tools
I have seen several Pinch lever devices on the internet that are on sale for quite some cash so have made up my own for almost nothing and also turned it into a pinch lifting device too.
Using good old 'recycled wood' (there surely is no need to buy this from anywhere - just keep looking till you find something suitable)
Simple to do:
Take a piece of wood about 50mm thick and 200mm x 400mm, drill a hole at the bottom in the middle. Put a bolt through the hole, attach a weight and make sure you have a nut to keep the disc safely attached.
To make the grip thicker, screw another piece onto the wood. Word of caution - be very very careful with your thumb when pinching at the limit of your range, it is very easy to damage your thumb and cause injury which will take months to repair itself (I know this from experience). Take a narrow grip first and increase the width slowly.
Pinch Lever

Thick Grip Pinch Lever

Pinch Lift

If you have no idea how to use this device then I would suggest watching this video
http://youtu.be/JEA_N4hdb-o
The pinch lift device should be self explanatory. Both exercises are great for building grip and forearm strength.
If you like this you may also like these other DIY Grip Strength Training devices
DIY Formulator
DIY Grip Strength - Pony Clamp
Homemade Strength 2
DIY Gada - Mace
DIY Inch Dumbbell Trainer
Dip Belt

Cost: less than $10 (hopefully)
Time: a few minutes
Difficulty: It gets no easier than this
Tools Needed:
Scissors to cut tape
Materials Needed:
Chain - 6 or 7 foot length (183 to 213 cm)
2 Carabiner clips - rated for a few hundred lbs. should be okay
Pipe insulation foam - you probably need about 3 feet (91 cm) length or so
Duct Tape
 |
| Mine is a bit fancier than the original design but I don't recommend that. |
Take your length of pipe insulation foam (sold in 6 foot lengths). Wrap it around your waist to measure how much you need. Cut it off at the appropriate length.
Put the foam around your chain. I prefer to put the foam so that it is near one end of the chain, a few links from the end. Now take duct tape and wrap the whole length of foam in the tape to seal it up (insulation foam usually comes with a slit down it so you can fit it easily over the pipe or in this case chain.
Clip a carabiner to the end of the chain. The end with the foam near it. This is basically your completed belt. You can add more layers of foam if you wish and tape them on as well but it doesn't really make a big difference in my experience. Heavy weights are uncomfortable even with many layers of foam and light weights are fine even with one layer of foam.

There are two ways to wear this thing (both shown above). One is like a hip belt where you simply use one carabiner and let the weight hang as it naturally wants to. To do this you simply put the chain through the center hole of your weight and then clip it into your one carabiner.
The other way to wear it is to use your first carabiner to clip to the other part of the chain on the other side of your foam. This creates a belt around your waist. Then you put the rest of the chain through the weight plates and back up, and use a second carabiner to clip the weighted loop of chain to your waist belt. The choice is yours. Now, here are my additional thoughts on this popular project.
 |
| Great with light weights, no so comfortable when it's heavy. |
Insulation foam helps, but there's only so much it can do. Even doubling or tripling the layers of foam doesn't solve the initial problem of the design. The problem is that a chain has a small surface area. So all the pressure of the weight is being distributed over a small area of your body. As I said, the foam helps increase this but the chain is the load bearing structure and it can and will make its presence known despite the foam.
A commercial dip belt, on the other hand, distributes the weight over the larger surface area of the wide belt, made of leather or fabric, itself.
You can see in the pictures above that I used higher quality materials rated for thousands of lbs. I don't recommend this. All you do is drive the price up (albeit not much). The fact remains this design is likely far too uncomfortable to load heavier amounts of weight on. If you get materials rated for a few hundred lbs. you should be okay because this belt will likely become hard to use (unbearably uncomfortable) at heavy poundages anyway. I also didn't use carabiners because I opted for stronger clips. But carabiners are faster and easier to use and like I said, you probably won't be able to tolerate loading a lot of weight onto this belt anyway.
Of course, it all depends on your goals and what you intend to do, but if you intend to dip as much as you possibly can, then in time you may need a properly designed commercial belt as apposed to a slightly padded chain digging into your hips.
But if you don't intend to dip very heavy then this design should suit you well. Since I have already made it, I will use this DIY belt until I am dipping heavy enough to need something better. We are all about saving money here at Homemade Strength, but we're most certainly not about using inferior equipment because we're stingy.
Most of the time you can make something that functions just as well as commercial products but when that is not the case, if a DIY option doesn't fulfill your needs, do not hesitate to buy something that does. Not everything can be easily made at home by the average person and a high quality commercial style leather or fabric dip belt is one of those things.
But I'll say again in the interest of fairness, it could be that in time you get used to it and maybe it's not so uncomfortable then.
- Carl
Tuesday, June 28, 2011
Looking Back at the Back: More on The Traps
In keeping up with my cyber-narcissism, I watch the stats to see what's popular here at my blog. Yes, the whole bench press-push-up thing dominates my page view counter but another interesting post shows up as a perenneal favorite: Traps without Weights
How does that happen, just out of curiosity? I'm hardly the neckless, cobra-like trap-monster required to give out any advice about them in the first place. I won't say that mine are huge, but I guess they're good enough for people to accept my advice about them. So, if you're hungry for my advice and you think I show enough in the Trap department to make a comment on how to make them tough, then let's chat...

This glorious cut of meat is one of those things that lots of BW fanatics, or maybe just strength training fanatics in general, love so very much but whine about not having them while wondering how to get them. I have to bring up the dirty word around here first and foremost: genetics. Some people just hit the lottery with their fiber count and attachment points. My sister's fiance is a great example. He can barely find the motivation to hit the weights but he sports a pair of super-high, almost 300-monster-immortal-like upper trap muscle. BASTARD!

So, let's talk about us, less-gifted mortals. I could launch into some sort of anatomy lesson here like I did the last time I posted about the Trap but I'll spare you this. After all, I'm not a doctor, or an accredited anything, so I probably don't have any business lecturing about it. I think I have a practical mind though and when I look at the trapezius muscle and read about its actions that I come up with my own conclusion about what the traps are stuck on our back to do: they keep our shoulder blades in their proper place, relative to the spine. Sure, they assist in the rotation of the shoulder blades and they also shrug them but those are minor roles. The former is the action that we need to intitiat in our training.
Another, lesser-known fact about the traps is that they're made of more, slower twitch fibers. After all, keeping the shoulder blades in their proper place is a full-time job, not a fast-strong burst action. So, to make them strong, we probably need sets of reps that keep them working for 30-60 seconds. Both of these ideas explain why farmers walking with weight in the hands works so much better than more isolating shoulder shrugging. If there's a force shoving the shoulder blades downward or upward (overhead pressing or farmers walking), the trap has to kick in to keep those shoulders where they need to be.
These are weighted exercises of course. BW also has something to offer, it's just not as obvious. In my past entry, I noted that pull-ups activate the trap and I gave an isometric exercise as well. Extending the range of handstand push-ups can also call up the trap muscle in a big way. If this isn't feasible, then try doing it with pike push-ups. Either way, just get your head below your hands as much as possible!
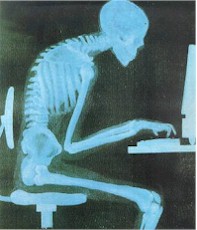
Perhaps I should have mentioned this earlier. It's probably more important than the exercises for the trap in the first place: posture! Nothing you do in an hour at the gym will come close to making up for 8 hours a day spent like this:
 This would also explain why the better trainers are so adamant about fixing posture problems before looking to make the muscles more powerful.
Like I mentioned above, maybe I have no business talking about any of this. We choose this subculture where our body sells our message. No, I don't have humongous muscles behind my ears but of all of the aches, injuries and pains I've inflcited on myself, my shoulders have remained sound and strong. My trapezius muscle may not be as flashy but they sure as shit get the job done with minimal issues. What more could anyone ask for?
How does that happen, just out of curiosity? I'm hardly the neckless, cobra-like trap-monster required to give out any advice about them in the first place. I won't say that mine are huge, but I guess they're good enough for people to accept my advice about them. So, if you're hungry for my advice and you think I show enough in the Trap department to make a comment on how to make them tough, then let's chat...

This glorious cut of meat is one of those things that lots of BW fanatics, or maybe just strength training fanatics in general, love so very much but whine about not having them while wondering how to get them. I have to bring up the dirty word around here first and foremost: genetics. Some people just hit the lottery with their fiber count and attachment points. My sister's fiance is a great example. He can barely find the motivation to hit the weights but he sports a pair of super-high, almost 300-monster-immortal-like upper trap muscle. BASTARD!

So, let's talk about us, less-gifted mortals. I could launch into some sort of anatomy lesson here like I did the last time I posted about the Trap but I'll spare you this. After all, I'm not a doctor, or an accredited anything, so I probably don't have any business lecturing about it. I think I have a practical mind though and when I look at the trapezius muscle and read about its actions that I come up with my own conclusion about what the traps are stuck on our back to do: they keep our shoulder blades in their proper place, relative to the spine. Sure, they assist in the rotation of the shoulder blades and they also shrug them but those are minor roles. The former is the action that we need to intitiat in our training.
Another, lesser-known fact about the traps is that they're made of more, slower twitch fibers. After all, keeping the shoulder blades in their proper place is a full-time job, not a fast-strong burst action. So, to make them strong, we probably need sets of reps that keep them working for 30-60 seconds. Both of these ideas explain why farmers walking with weight in the hands works so much better than more isolating shoulder shrugging. If there's a force shoving the shoulder blades downward or upward (overhead pressing or farmers walking), the trap has to kick in to keep those shoulders where they need to be.
These are weighted exercises of course. BW also has something to offer, it's just not as obvious. In my past entry, I noted that pull-ups activate the trap and I gave an isometric exercise as well. Extending the range of handstand push-ups can also call up the trap muscle in a big way. If this isn't feasible, then try doing it with pike push-ups. Either way, just get your head below your hands as much as possible!
Perhaps I should have mentioned this earlier. It's probably more important than the exercises for the trap in the first place: posture! Nothing you do in an hour at the gym will come close to making up for 8 hours a day spent like this:
 This would also explain why the better trainers are so adamant about fixing posture problems before looking to make the muscles more powerful.
 Like I mentioned above, maybe I have no business talking about any of this. We choose this subculture where our body sells our message. No, I don't have humongous muscles behind my ears but of all of the aches, injuries and pains I've inflcited on myself, my shoulders have remained sound and strong. My trapezius muscle may not be as flashy but they sure as shit get the job done with minimal issues. What more could anyone ask for?
Subscribe to:
Comments (Atom)


